Introduction
The Arduino Uno, combined with a Sound Sensor Module, allows you to capture and analyze sound levels in various applications. In this comprehensive guide, we will explore the functionality of a Sound Sensor Module, learn how it works, and discover how to use it effectively with the Arduino Uno for sound-related projects.
Working
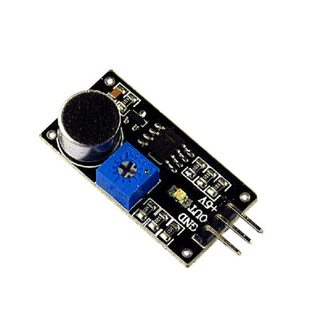
A Sound Sensor Module is designed to detect and convert sound waves into electrical signals. It typically consists of a microphone, a preamplifier, and an analog output. When exposed to sound, the microphone generates electrical variations proportional to the sound’s intensity. These variations are then converted into analog voltage levels, making it possible to measure and interpret sound data.
Components Required
To get started, you will need the following components:
- Arduino Uno
- Sound Sensor Module
- Jumper Wires
- Breadboard (optional)
Wiring
Connect the Sound Sensor Module to the Arduino Uno as follows:
- Connect the VCC (or +) pin of the module to the 5V pin on the Arduino.
- Connect the GND (or -) pin of the module to any ground (GND) pin on the Arduino.
- Attach the OUT pin of the module to analog pin A0 on the Arduino.
Code
Here is a basic Arduino code example to read and print sound levels from the Sound Sensor Module:
const int soundSensorPin = A0;

void setup() {

  Serial.begin(9600);

}


void loop() {

  int soundLevel = analogRead(soundSensorPin);

  Serial.print("Sound Level: ");

  Serial.println(soundLevel);

  delay(500); // Adjust the delay as needed

}
Conclusion
The combination of an Arduino Uno and a Sound Sensor Module provides a versatile platform for sound-related projects. Whether you want to create a sound-activated device, monitor noise levels, or build a simple sound recorder, this setup offers endless possibilities for audio-based applications.
FAQ
- What is the typical use of a Sound Sensor Module?
- Sound Sensor Modules are commonly used in projects that involve sound detection, noise monitoring, voice-activated systems, and even simple audio recording applications.
- Can I adjust the sensitivity of the Sound Sensor Module?
- Yes, you can typically adjust the sensitivity of the module using the onboard potentiometer. Turning the potentiometer knob clockwise increases sensitivity, while turning it counterclockwise decreases it.
Troubleshooting Q&A
- I’m getting inconsistent or noisy readings from the sound sensor. What could be causing this?
- Check your wiring connections and ensure that they are secure. Additionally, adjust the sensitivity using the potentiometer until you achieve stable readings. Avoid placing the sensor too close to noisy sources or speakers.
- How can I calibrate the sound sensor for specific sound levels or frequencies?
- Calibration may require additional components and a reference sound source. It involves measuring known sound levels and adjusting the sensor’s sensitivity accordingly. Calibration procedures can vary, so consult the module’s datasheet or documentation for guidance.
By following this guide, you can harness the capabilities of a Sound Sensor Module and Arduino Uno to create innovative sound-related projects. Whether you’re interested in building a sound-activated light, monitoring environmental noise, or conducting audio experiments, this combination offers a valuable platform for audio sensing and analysis.

Leave a Reply